If you’re headed to Oahu or are already travelling through, chances are that you’re interested in doing the Haiku Stairs hike. Or you may be more familiar with its more common name, the Stairway to Heaven. After completing the hike by taking both the illegal route (up) and legal route (back down), I’ve got all the insider info! It will not only help you avoid getting a hefty fine but also from getting lost. Read on for the ultimate Stairway to Heaven hiking guide!
History & Risks while illegally climbing
While the stairs have been closed since 1991, people are still climbing them illegally. There’s been talk of tearing them down for a while but now it may happen in the near future. The Board of Water Supply for the island is responsible for the stairs and have been working towards a vote of tearing them down as soon as April/May 2020.
Most of the complaints are coming from those living in the neighbourhood that many hikers choose to use as an entry to the stairs. Security and police are known to patrol the area nearby and you can risk getting fines. They can range anywhere from $500-$5000 USD (but we’ll get into that in more detail later!).
Illegal Route
So you’re thinking about taking the illegal route for the Stairway to Heaven hike? There’s a lot you’ll need to know beforehand if you’re going to avoid fines and getting lost along the way. The illegal route is simply using the stairs to get to the top or back down from the hike.
Choosing your route:
First things first, choose your route. If you search “Stairway to Heaven map” on Google, you’ll find this image below.
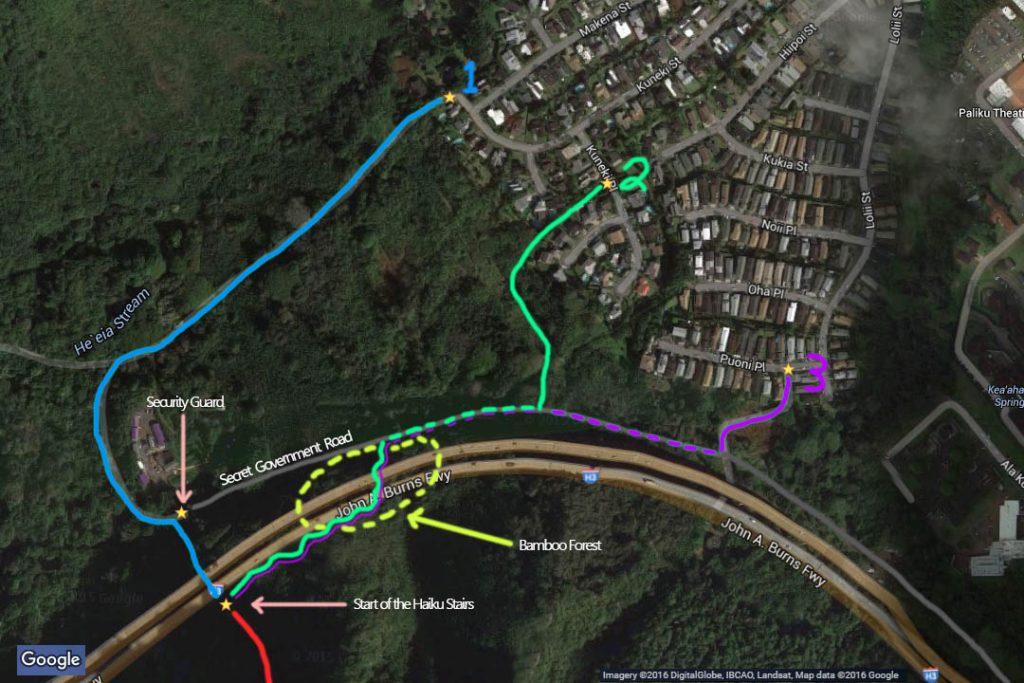
As you can see there are 3 ways to access the stairs. I went with the second option, so that’s the route I’ll walk you through below.
Timing:
The next thing you’ll need to decide is the best time to go. After speaking to many people who had done the hike a few times already, I decided to go around 10am. I heard that more people got caught before sunrise and I wouldn’t recommend going at that time anyways as it would make the hike much more challenging. Going through the woods and up and down hills at dark gets a no from me!
Starting the hike:
You’ll need to drive or get an Uber to Kuneki Place. We were told to park on Kuneki Way, which is the street next to Kuneki Place. Unfortunately we ran into a bit of trouble when a local caught on to our plan and started tailing us around the neighbourhood. I’d recommend parking on a street further away and grabbing an Uber from there if you’re driving.
Once you get to Kuneki Place that’s where you’ll find two fences you’ll have to hop. If you see someone sitting in their car watching you, wait a while and come back later as they could be undercover cops. Once the coast is clear, hop over the two fences pictured below and run along the storm drain.
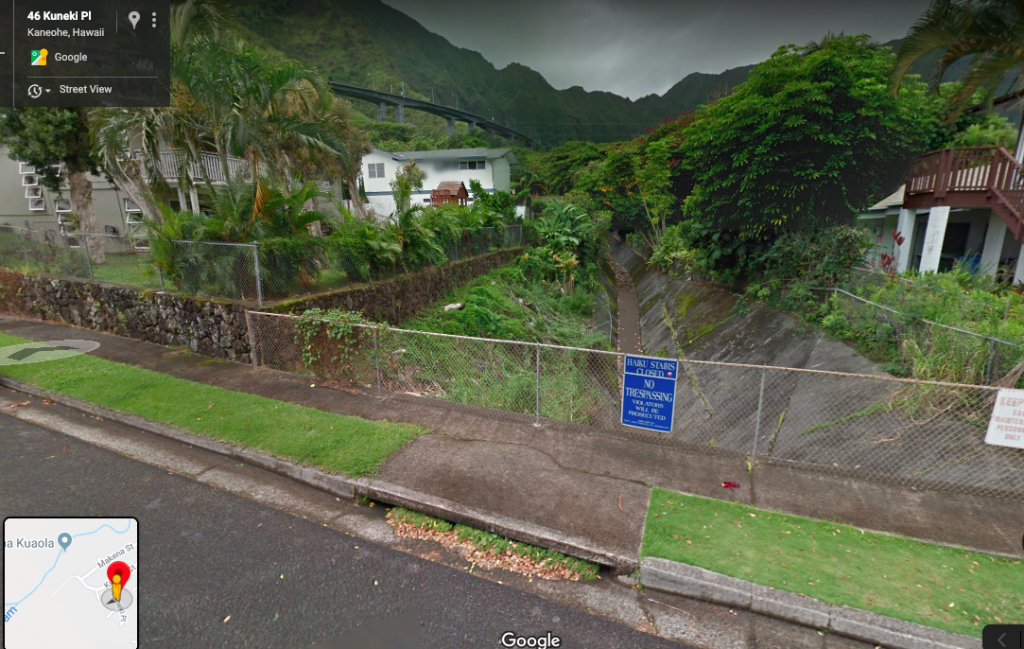
There will be dogs barking from the backyards that back onto the fenced area and storm drain but ignore them and keep going! Next you’ll have to make your way through a forest, following pink markers. Stay with them until you make your way up to the secret government road that’s under the freeway. Then go through a hole in a fence before you reach the road and get out of the woods.
Before you cross that secret government road, stay in the bushes and make sure you don’t see any police or security car nearby. My friend and I made the mistake of just running across without looking and encountered a security car. We ran up into that forest to hide which ultimately added a lot more time to our journey.
Once you successfully cross the secret government road, you’ll pass graffiti on some cinder blocks and will know you’re going the right way. Next make sure you travel right along the forest, following the pink markers along the trail. Once you get to the end where the stairs begin, you’ll see a bit of a clearing. When you look, that’s where the security guard and police will most likely be. If you see police, stay in the woods and wait around 30 minutes. If you don’t see anyone there, take advantage and slowly go down the steep dirt hill until you reach the beginning of the stairs.
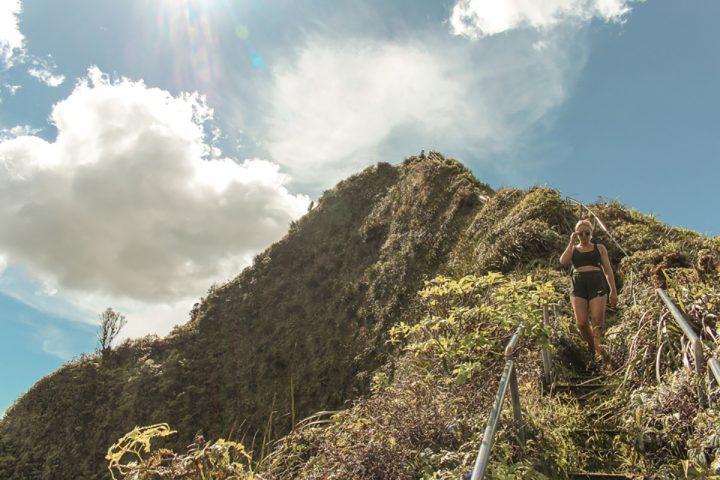
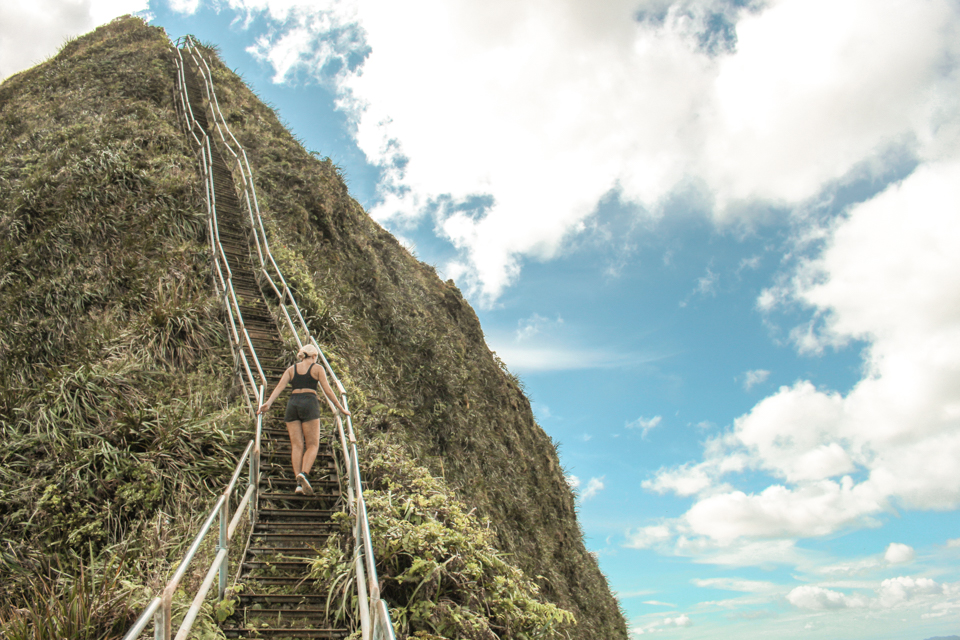
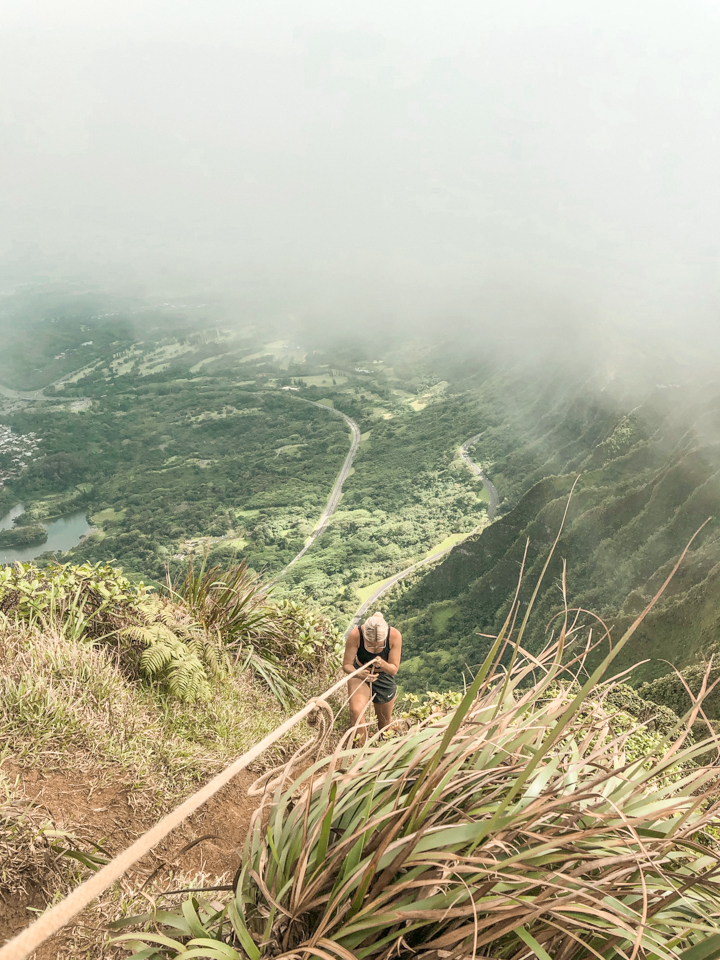
Climbing the stairs:

As soon as you get to the start of the stairs for the Stairway to Heaven hike, you’ll have to hop over another fence or two and then you’ll be set! Security and police apparently rarely come after you once you’re on the stairs. That means you’re pretty much safe at that point. With that being said, I still made my way up fairly quickly in fear.
While the stairs are very steep (90 degrees) at some points along the way, they’re not too challenging. Just make sure to have a good night’s rest beforehand so you have the energy to hold on tight as you climb up to the top!
There are a few points where the railing was completely sideways/broken and steps that were a tad wobbly so just be aware of that. You don’t want to miss a step along the way! It goes without saying that you’ll want to hold onto your belongings and avoid taking pictures at the most vertical points unless you don’t mind losing your phone/camera. Regardless, you’ll get some spectacular views so take advantage and get pictures and videos when it’s safe to do so!
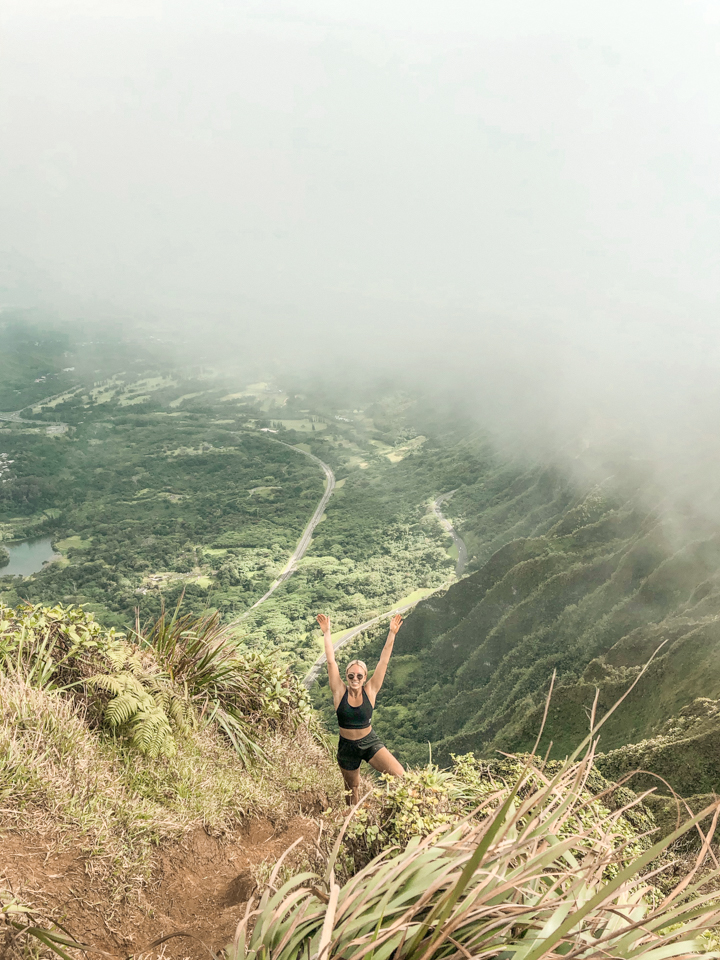
Once you get to the top you can climb atop a pillbox and hangout for a while. There was only about 10 people at most when we made it to the top around 1pm and we only encountered a handful of people going back down the stairs as we climbed up.
Legal Route
If you’re not really up for the risk of getting a fine, the legal route is probably your best bet. You can access it from a car park and there’s no doubt that it’s beautiful!
Here’s a few things to consider before you choose to take the legal route!
Pros:
- No risk of fines – This is definitely the biggest pro, considering the fines can be quite high if you do get caught.
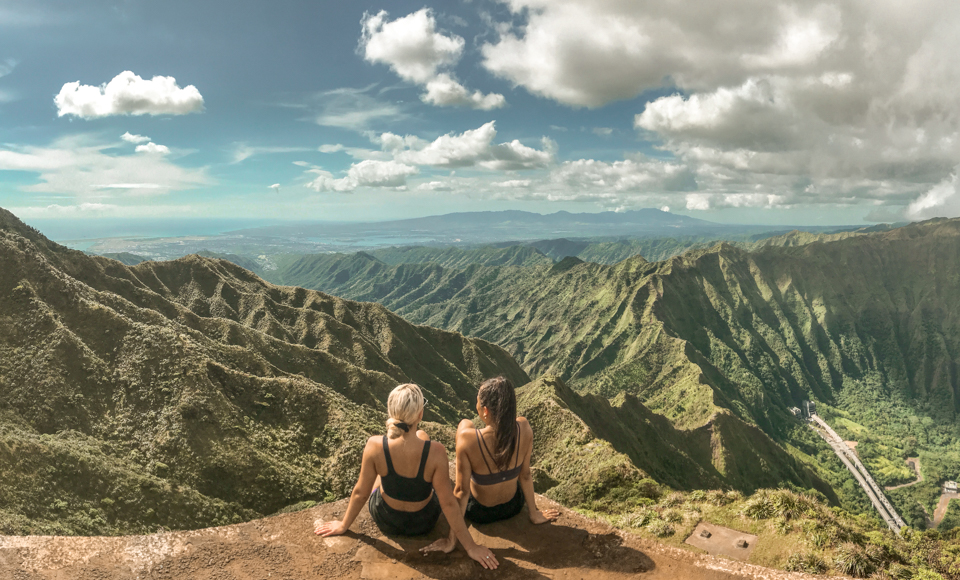
- Stunning views – Although the stairs offer a view you won’t find anywhere else, taking the legal route at least one way provides you with a stunning mountainous landscape. You can also take pictures on the stairs from the top and trick your friends into thinking you did the illegal route if the risk seems too high.
Cons:
- Much harder – Despite it being the legal route, hiking this way up or down is MUCH harder than taking the stairs!! You’ll have to scale the side of a mountain with no barricades on either side of you. If you’re not wearing hiking boots and just came with running shoes, you better believe that you’re going to slide most of the way down to avoid injury or falling.
- Longer – This route is about double the length of taking the stairs. It took us about 4 hours once we were on the right track. The last hour will be fairly flat so keep that in mind.
I reckon taking the illegal route one way and the legal route the other way is the best compromise. Not only will you get to experience both views but you’ll endure less of a risk. You’ll also still get the adrenaline of not getting caught when you make it up or down the stairs during the Stairway to heaven hike.
Bonus tips
This Stairway to Heaven hike guide wouldn’t be complete without a few extra bonus tips!
- GRAYL water bottle – This water bottle is nothing short of amazing. I used it to filter water from a stream on the hike and I can’t recommend it enough. Save 10% on your first order.
- Bug spray – Make sure you bring some or create your own natural mix because the bugs are out to play!
- Group size – Don’t have a group of more than 5 people if you’re taking the illegal route. It will be much harder to get away with it. I personally think 2-3 is the best!
- Be respectful to neighbours – If you take the same illegal route I did, be respectful of the neighbours surrounding the path.
- Don’t leave things behind – Don’t leave food or garbage behind! Let’s try not to further impact the environment.
- Don’t bring ID with you – In the off chance you get caught, make sure you don’t have ID with you. This means credit cards as well! Leave them in your car/at your hostel.
- What to bring – Heaps of water (or bring a GRAYL water bottle with you to filter stream water), sunscreen, snacks, first aid kit and we can’t forget the speaker!
- Look up maps beforehand – Take it from a gal who got lost twice during this hike! Screenshot the map for both the illegal and legal route so that you don’t end up stranded at the top!
So that concludes the Stairway to Heaven hike guide!
Interested in more Oahu hikes or things to do while you’re in Honolulu? Head to my Instagram for some inspo and I’ll have more info/itineraries up very soon!
Cheers,
Amy xx
Before you go, this is your reminder to make sure you have travel insurance before your next trip! I’ve personally been using SafetyWing’s Travel Medical Insurance for over a year now and couldn’t recommend it more.

4 thoughts on “Stairway to Heaven Hike Guide (Illegal & Legal Route)”